Restore a HDD from an Image
This section covers the restoration of a hard drive image from a supplied bootable USB drive. For this restoration process the supplied Congrego® bootable USB drive will be needed.
Warning
Note that before restoring a drive image, if possible, any data still on the drive that needs to be backed up should be removed and backup up onto another storage device.
Once the image restoration commences all data on the drive will be unrecoverable!
Step 1:
Ensure that the bootable flash drive is plugged into the host computer. Boot the logger into the BIOS, this may be achieved by pressing the Del, F12 or F2 keys on startup, depending on the system.
Under Save and Exit select the Boot Override to be the bootable USB flash drive.
Select F10 to save and exit the BIOS, the logger will continue to boot.
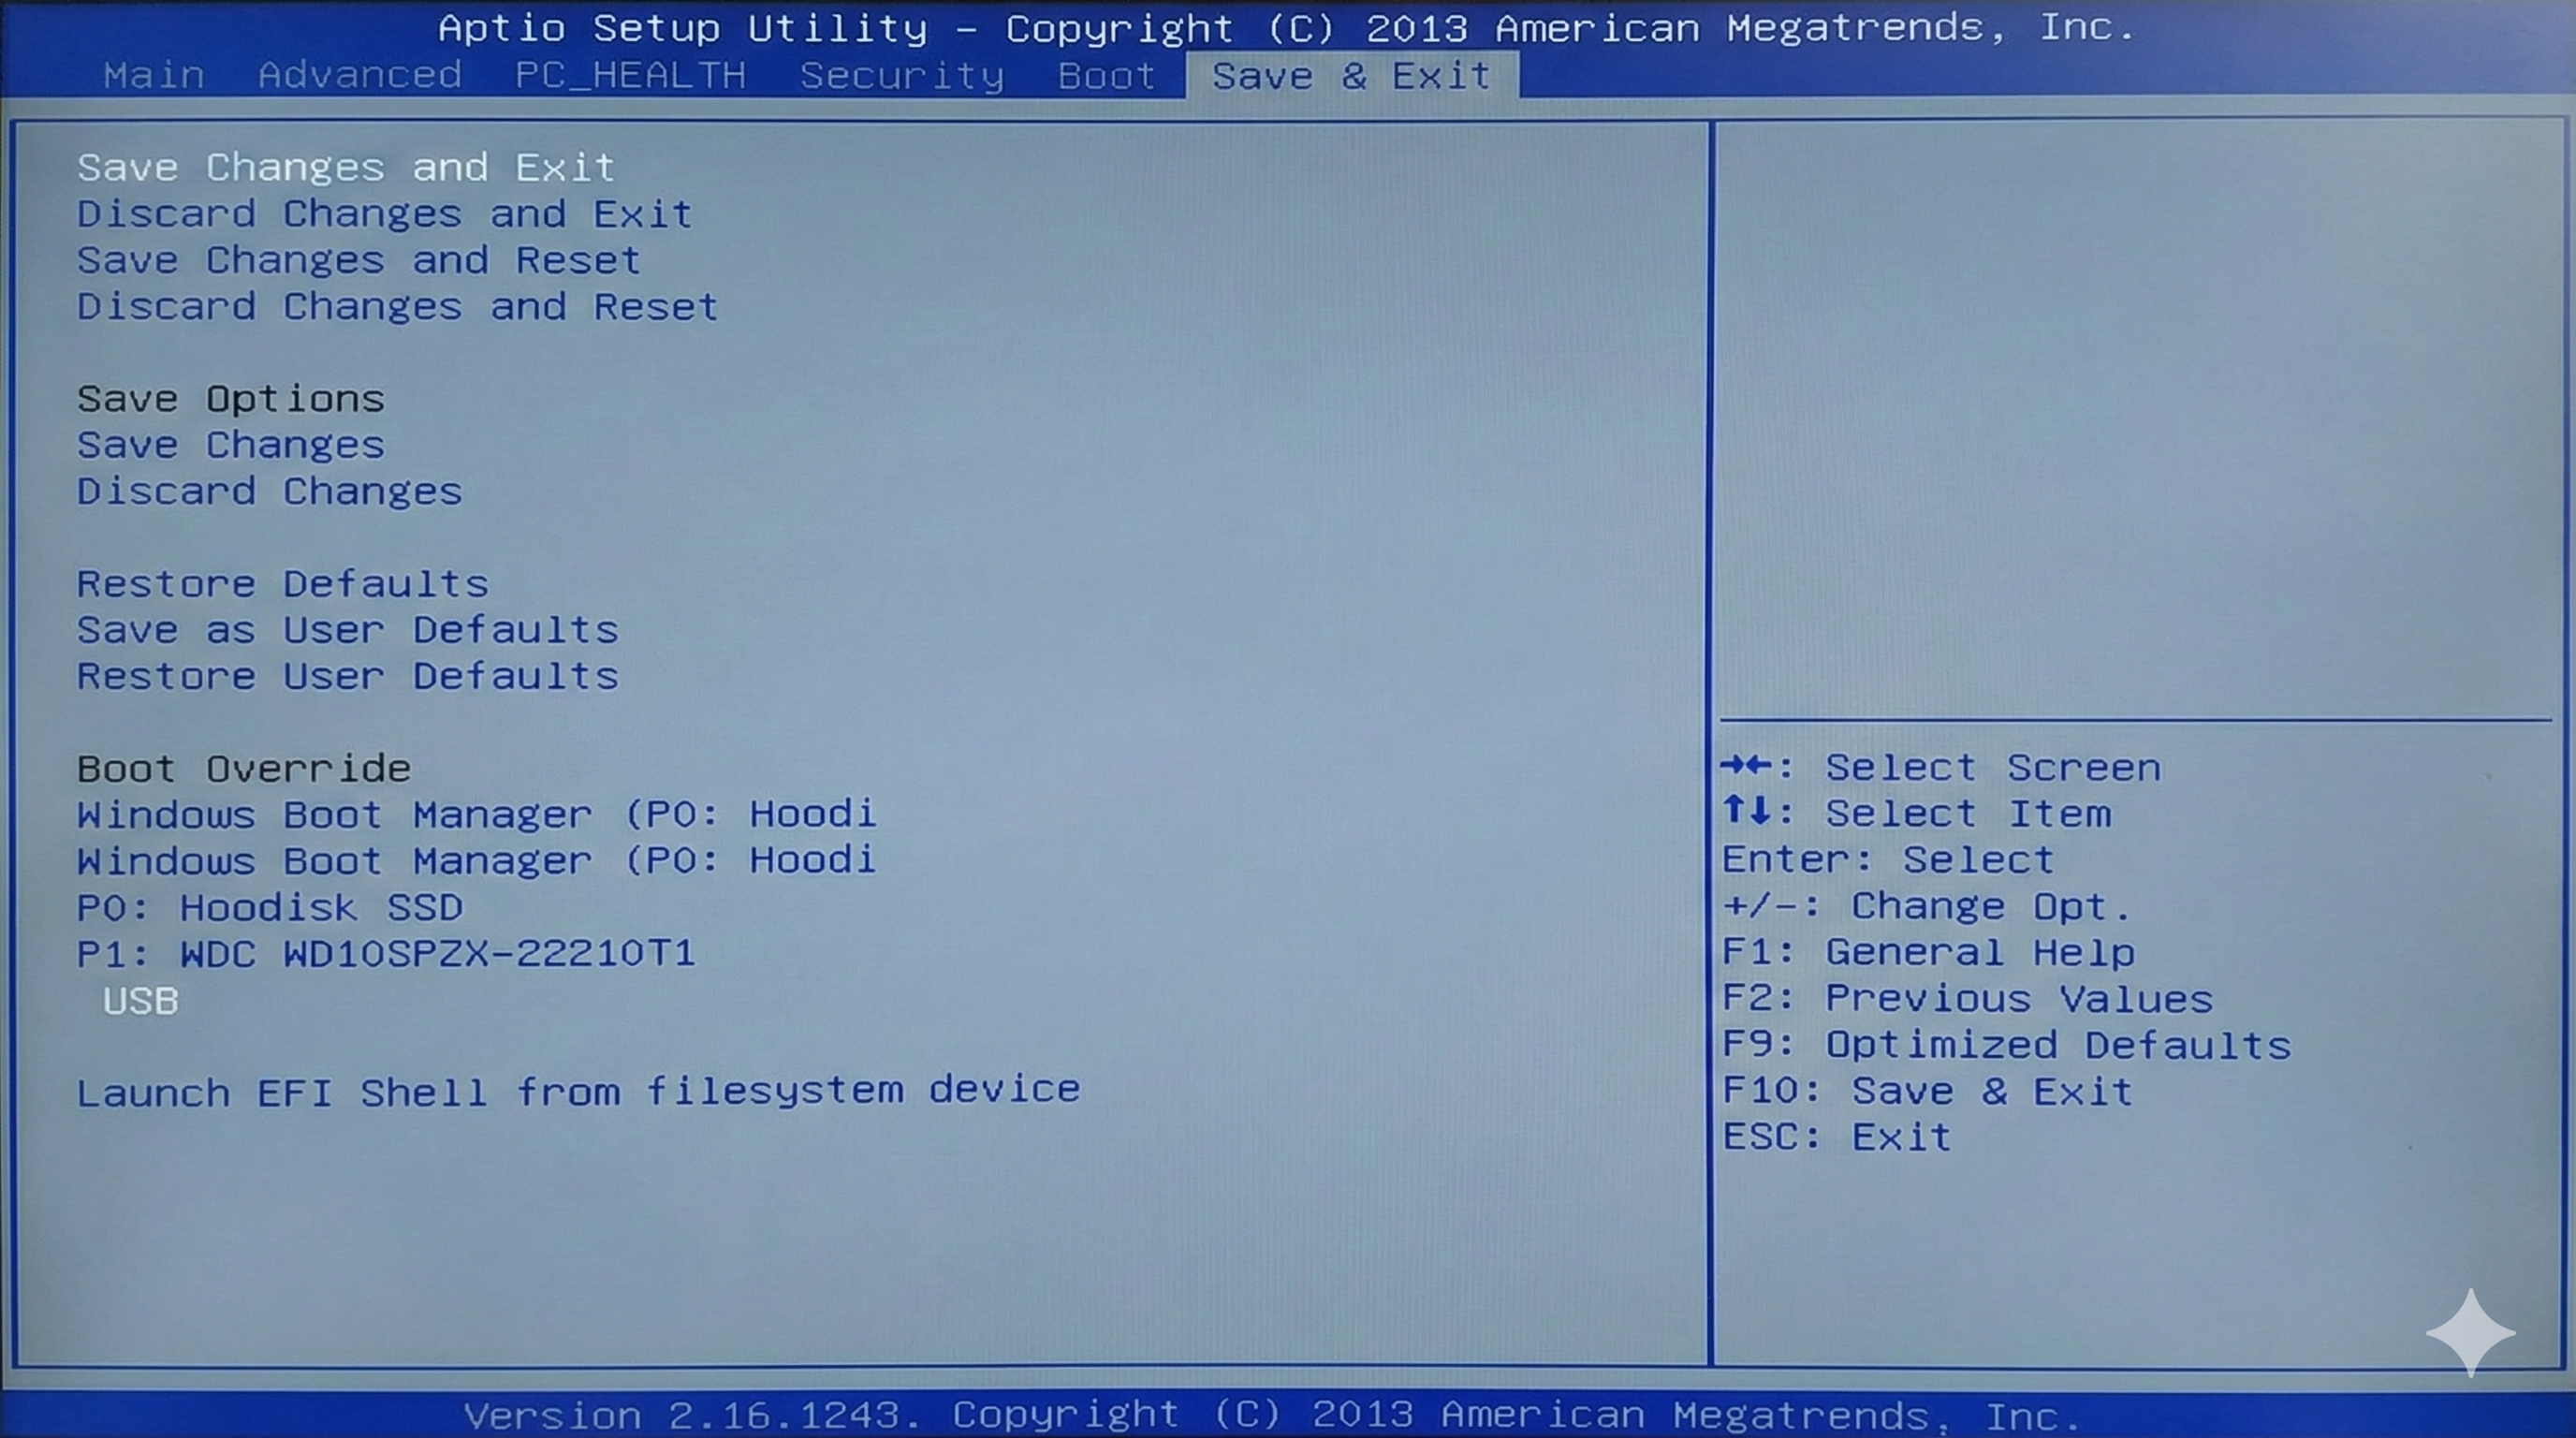
Enter the BIOS
Step 2:
Select the image that is going to be restored.
As this is a supplied USB drive there will only be a single image for selection. If no selection is made the system will default to this image
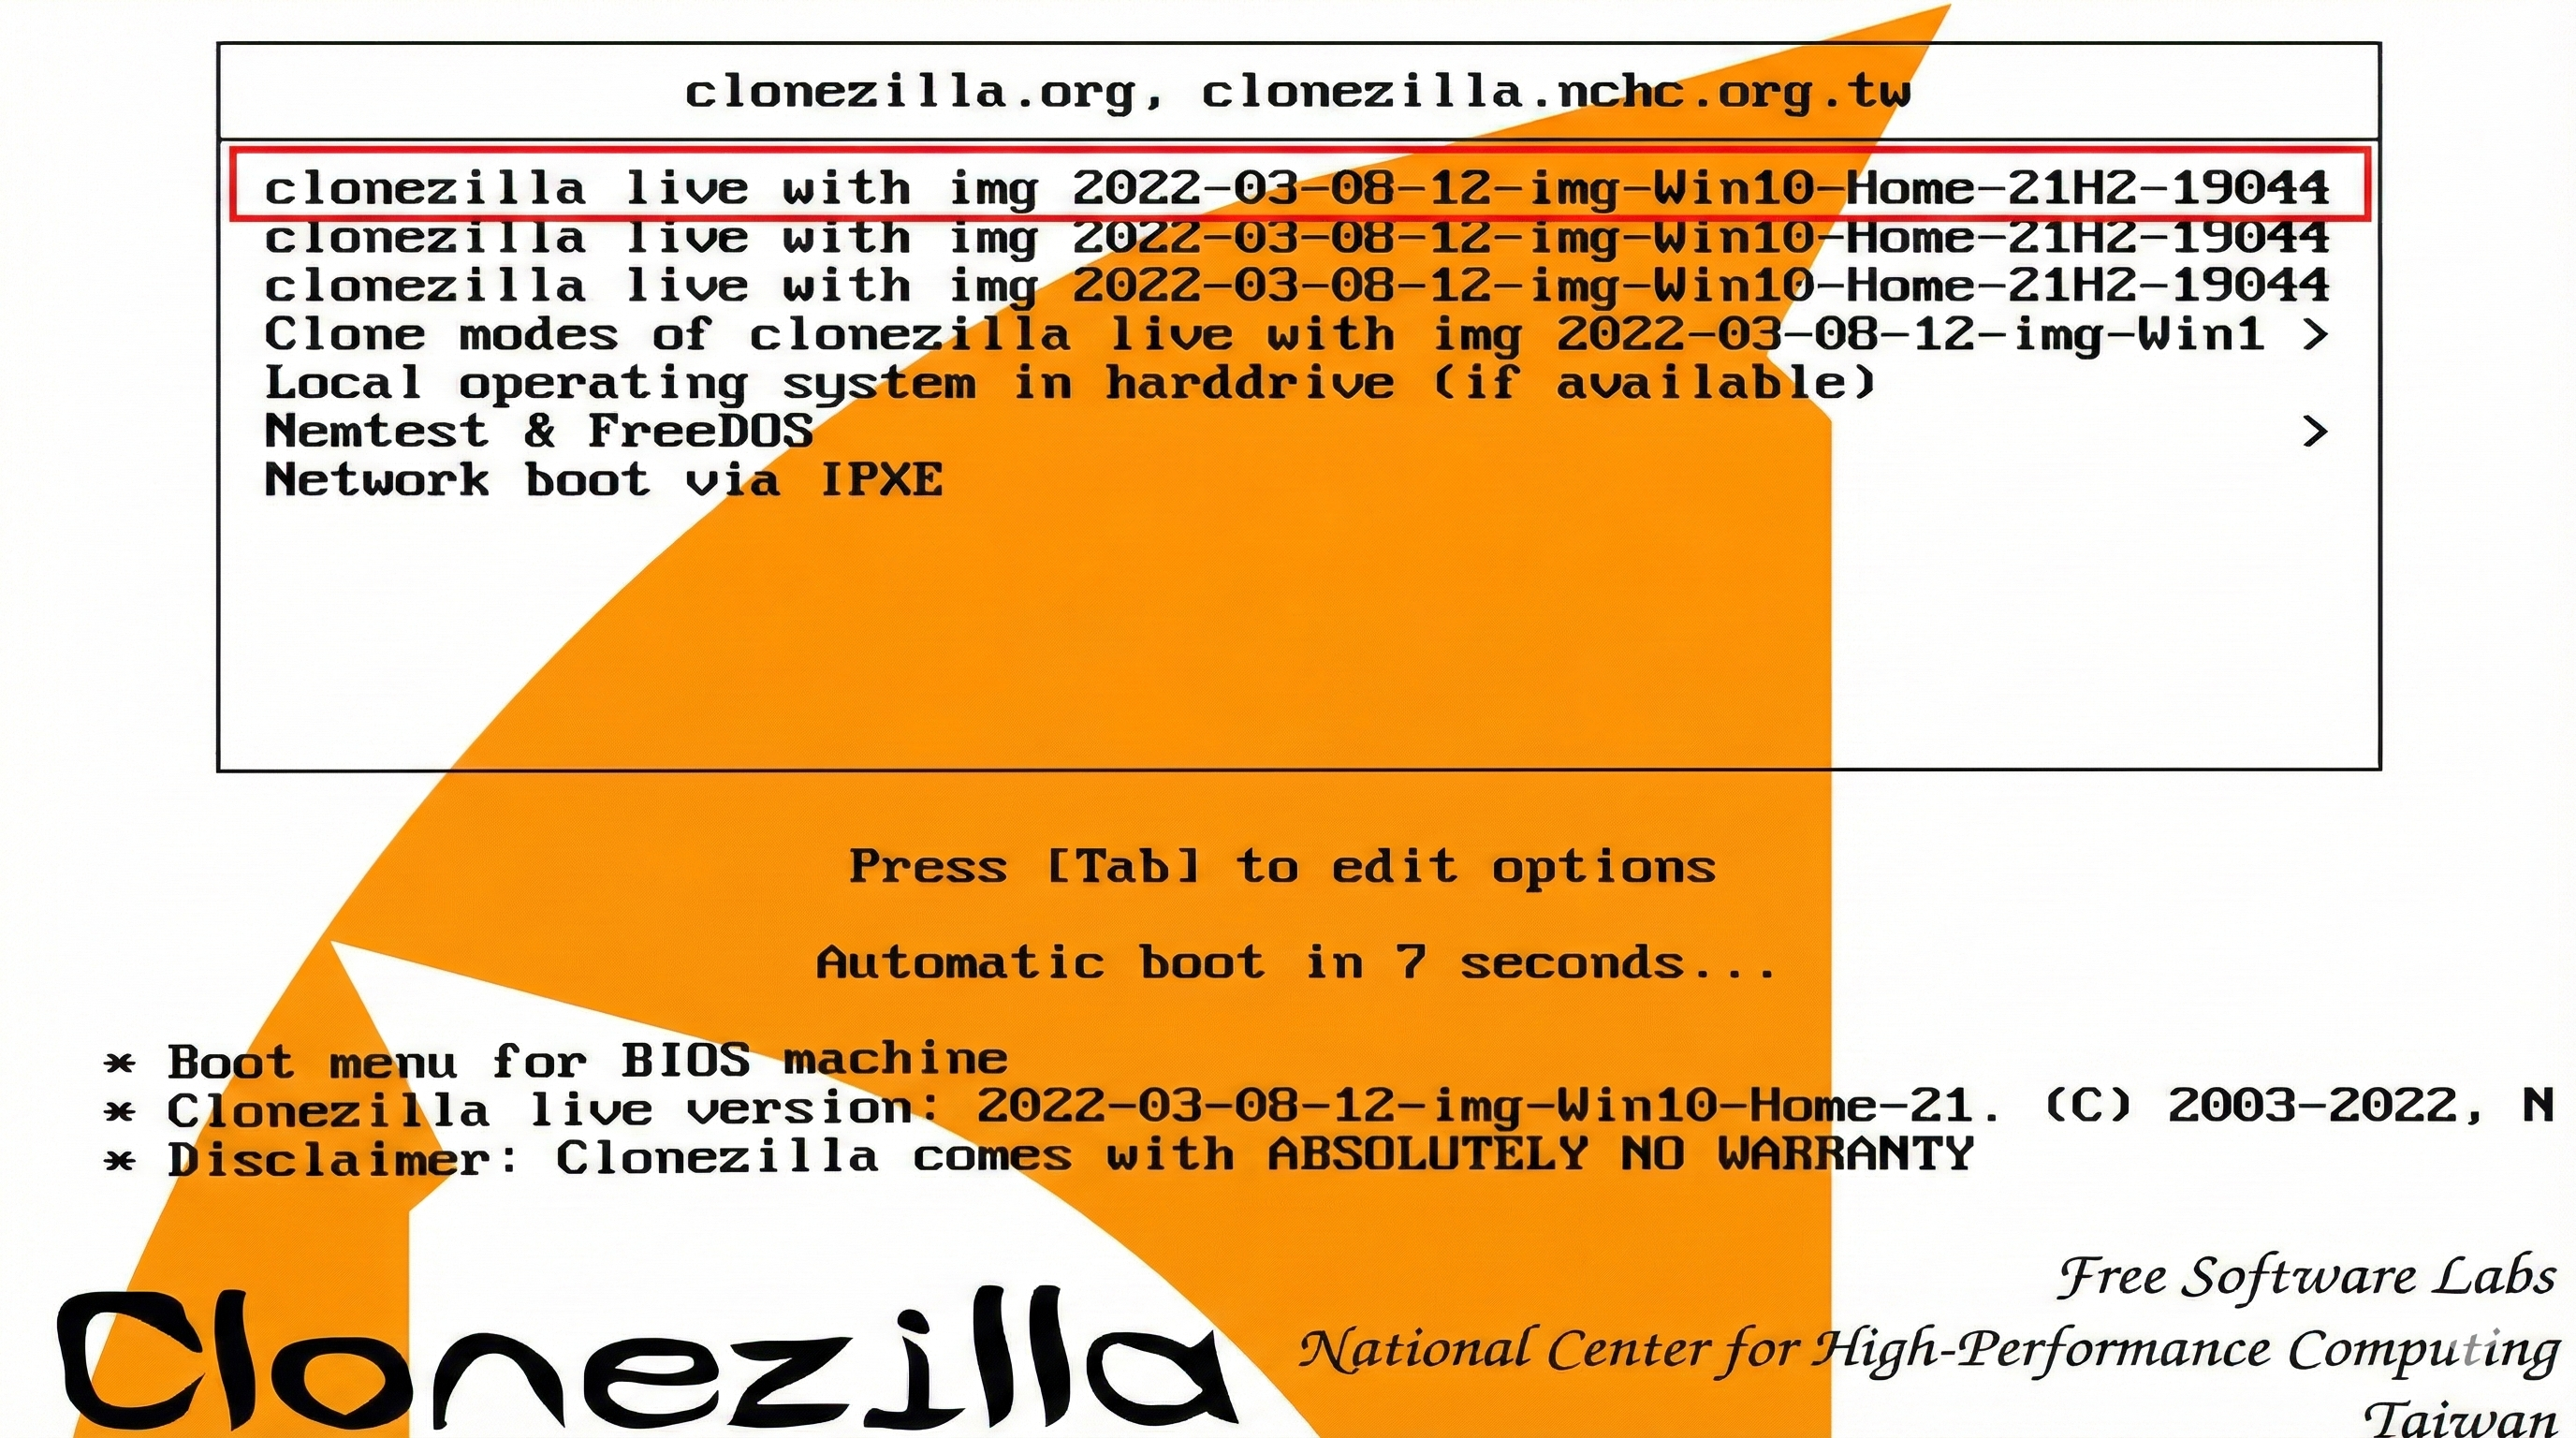
Select the image to restore
Step 3:
The image will be checked for integrity, depending on the size of the image this may take a few minutes.
Should this step fail then the image is not deemed safe to restore. Contact your representative for help.
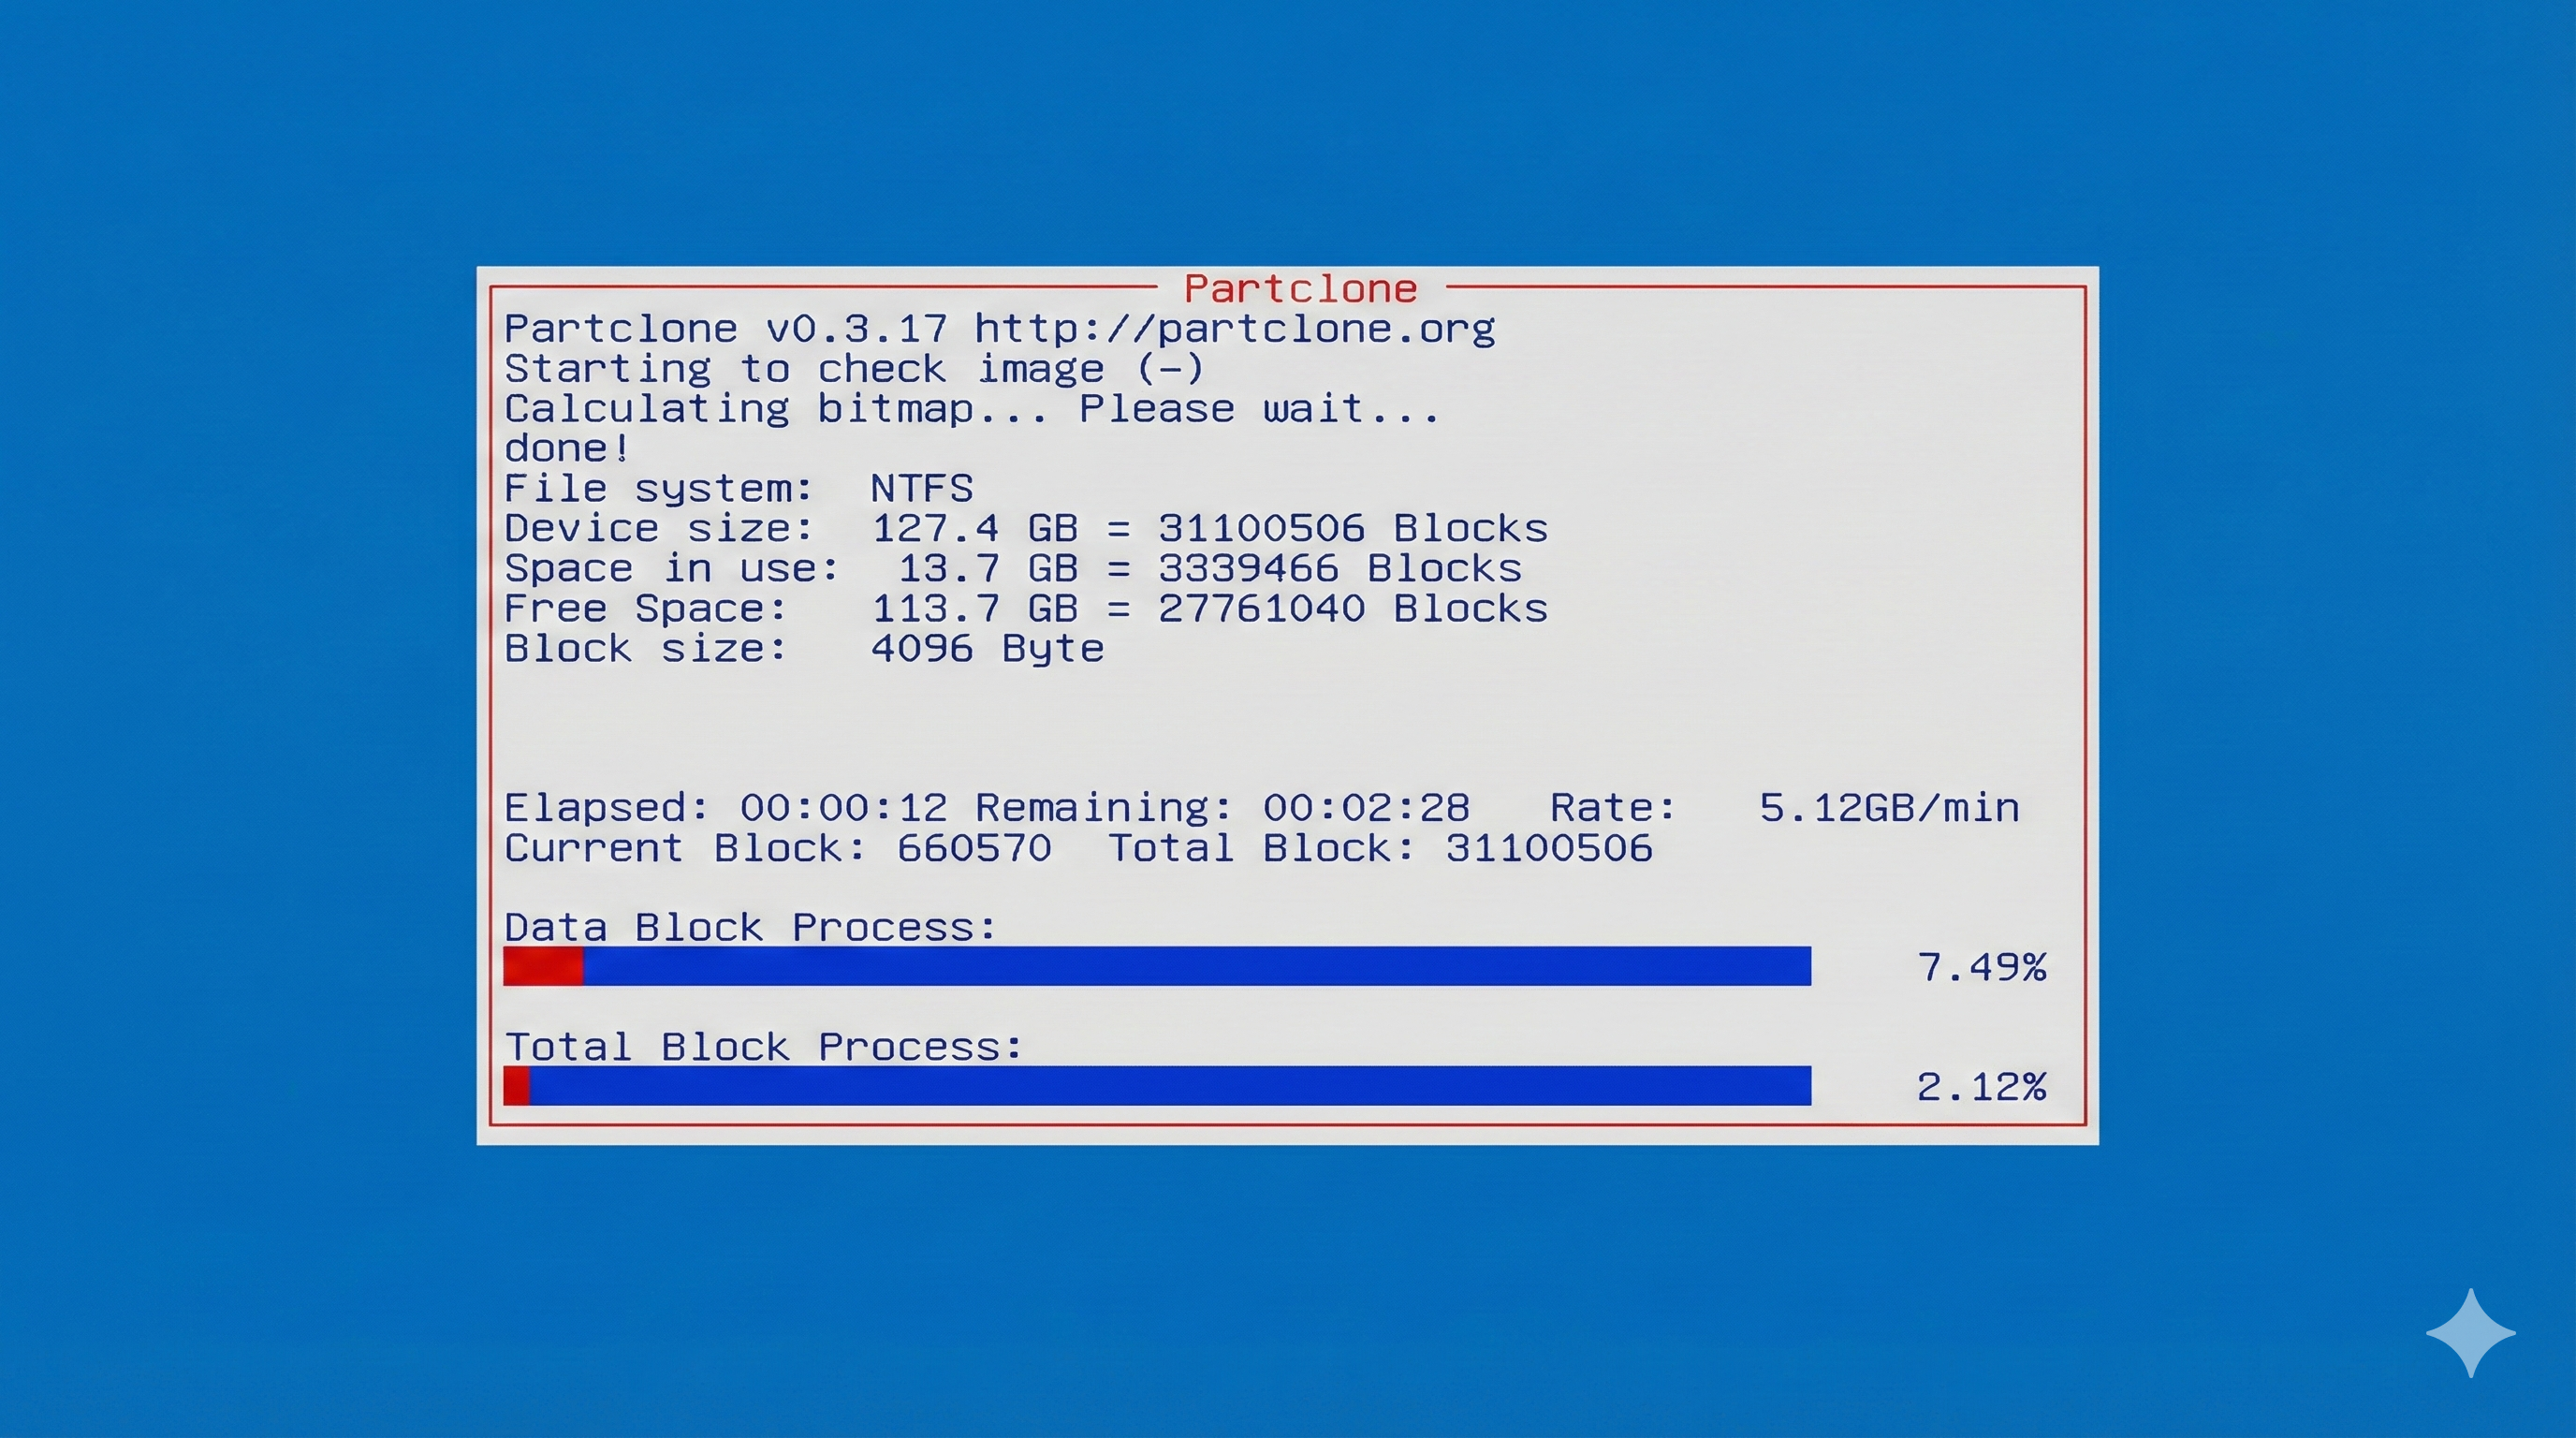
Checking the image
Step 4:
Once the image check completes successfully the process can continue.
When generated the image is preconfigured to restore the primary hard drive. Press Enter to continue the restoration process.
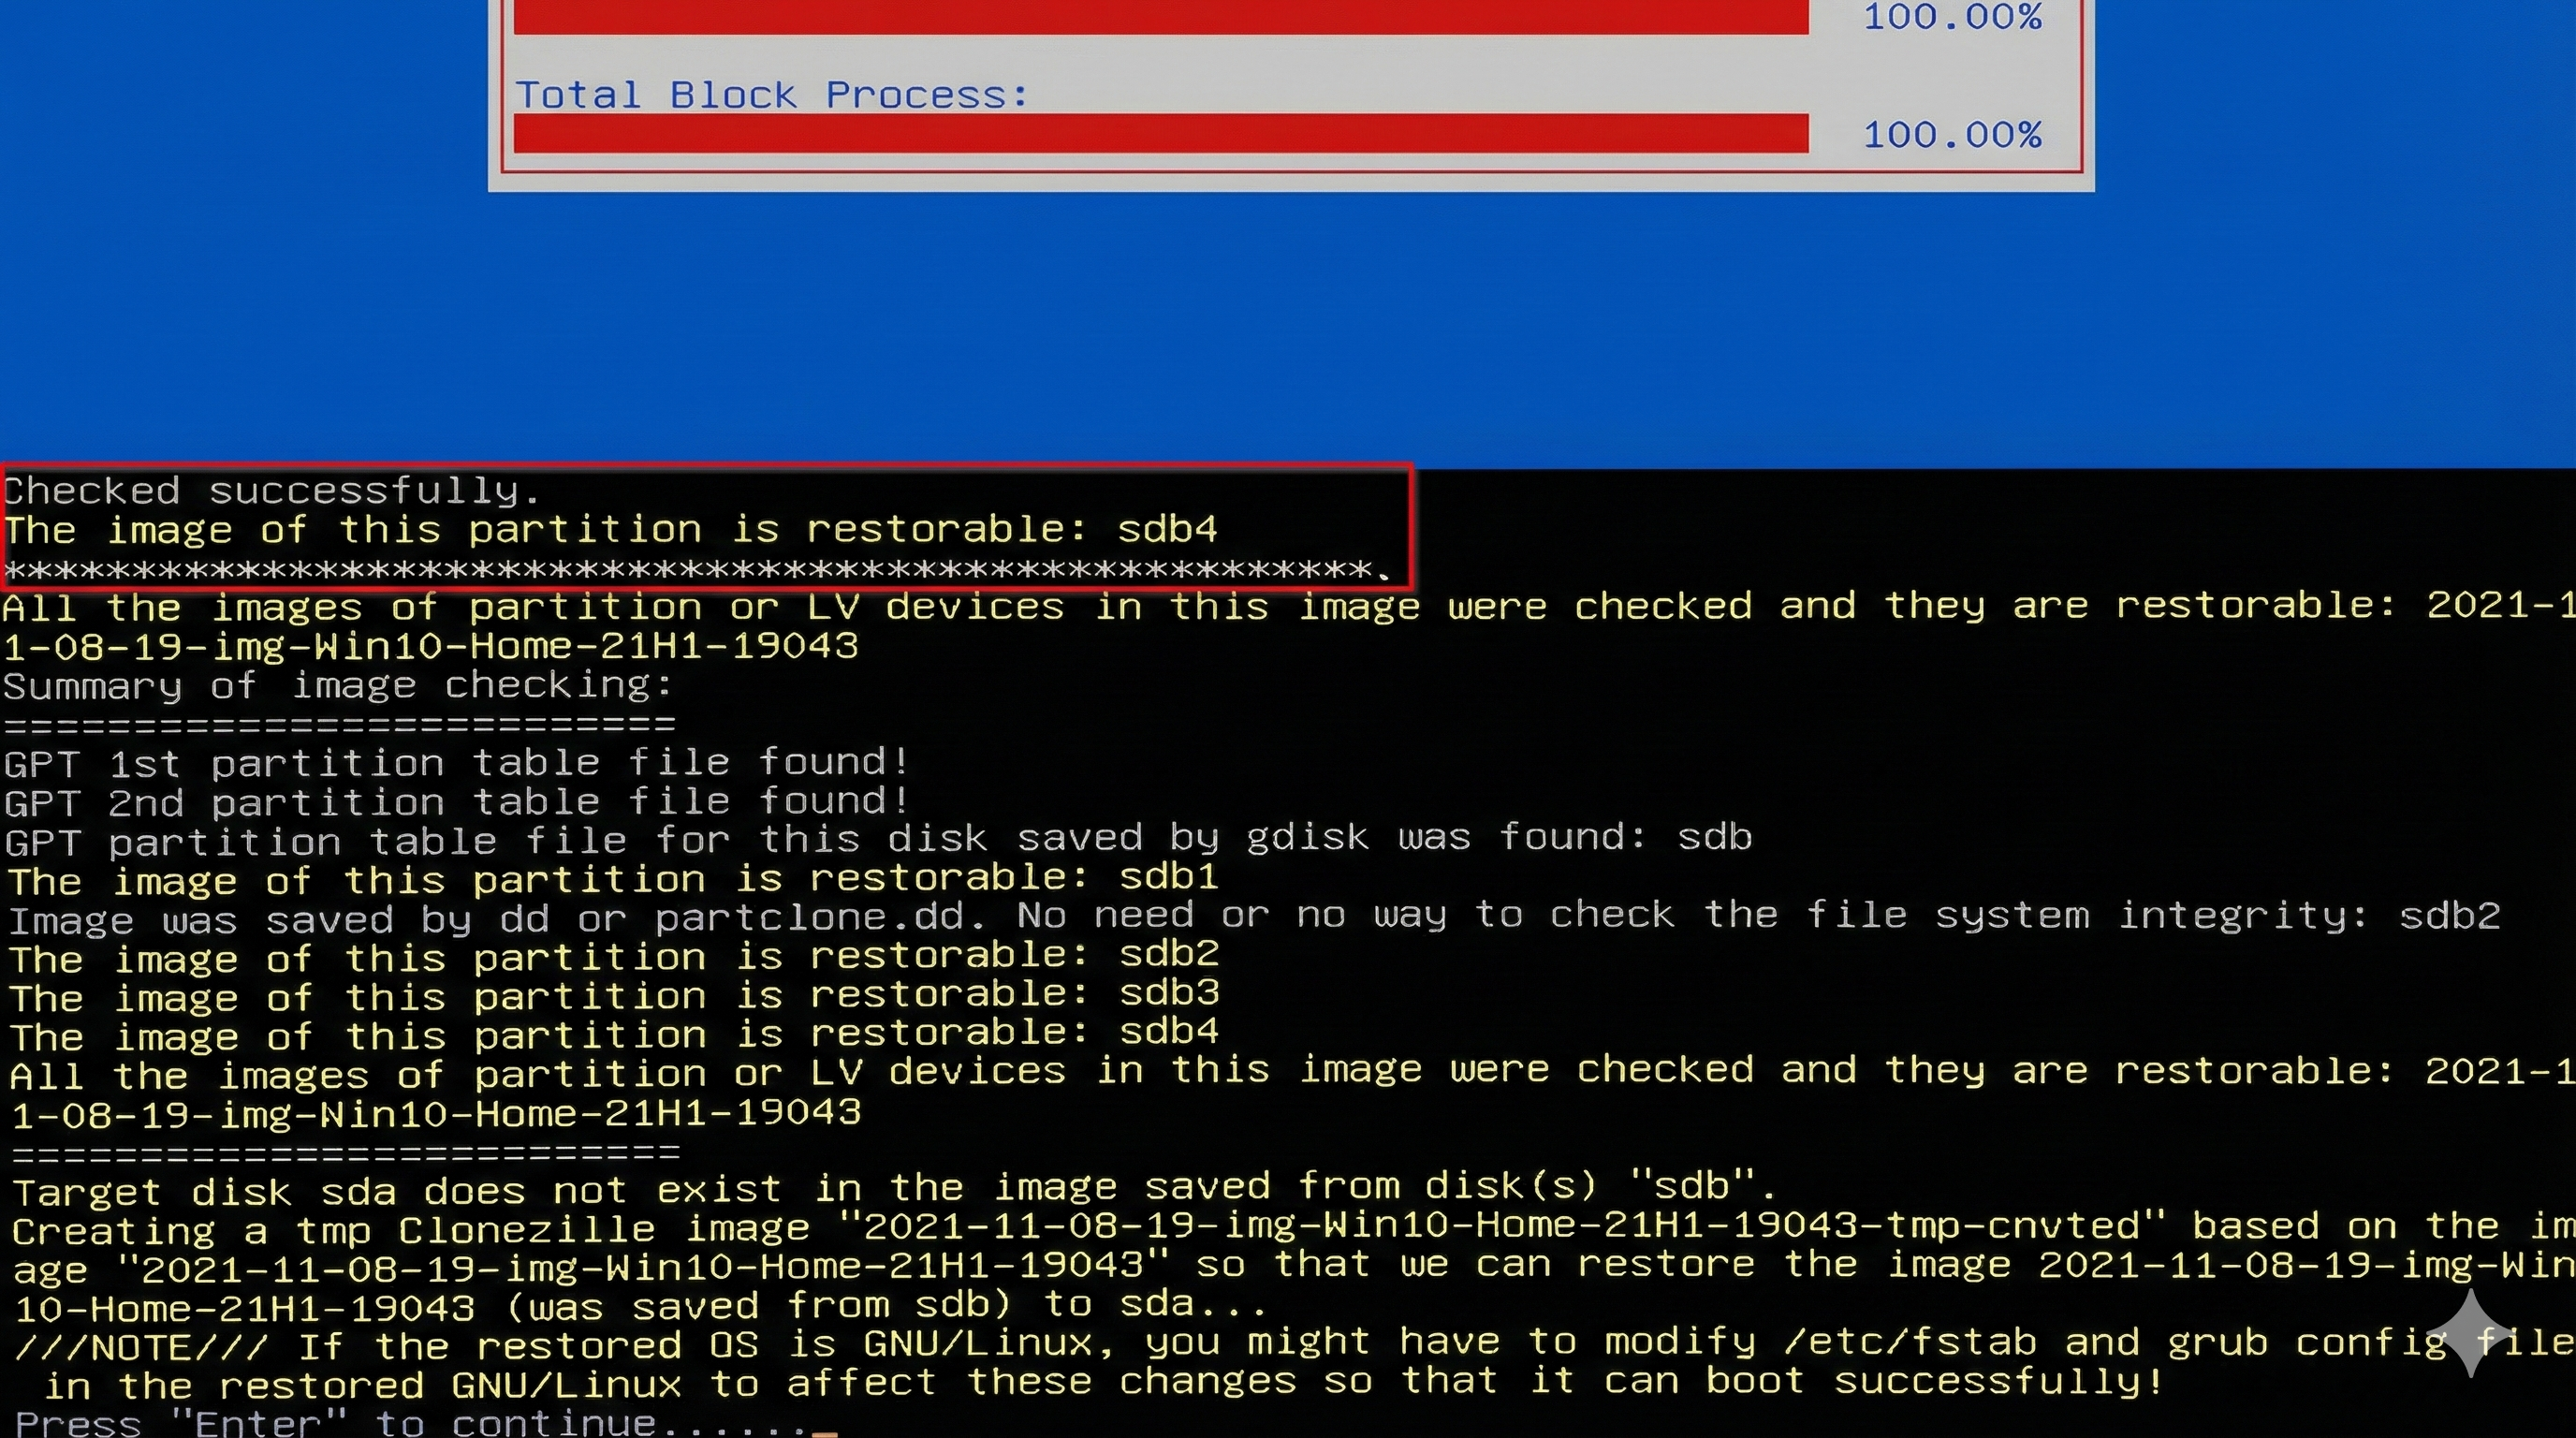
Image restoration
Step 5:
Final checks are made before another confirmation is requested. It is important to check that the image to be restored is the SSD device, this is the primary drive in the system.
The name may be Hoodisk, although this may vary. Select 'y' to continue the restoration, after this point the contents of the disk drive will be lost forever
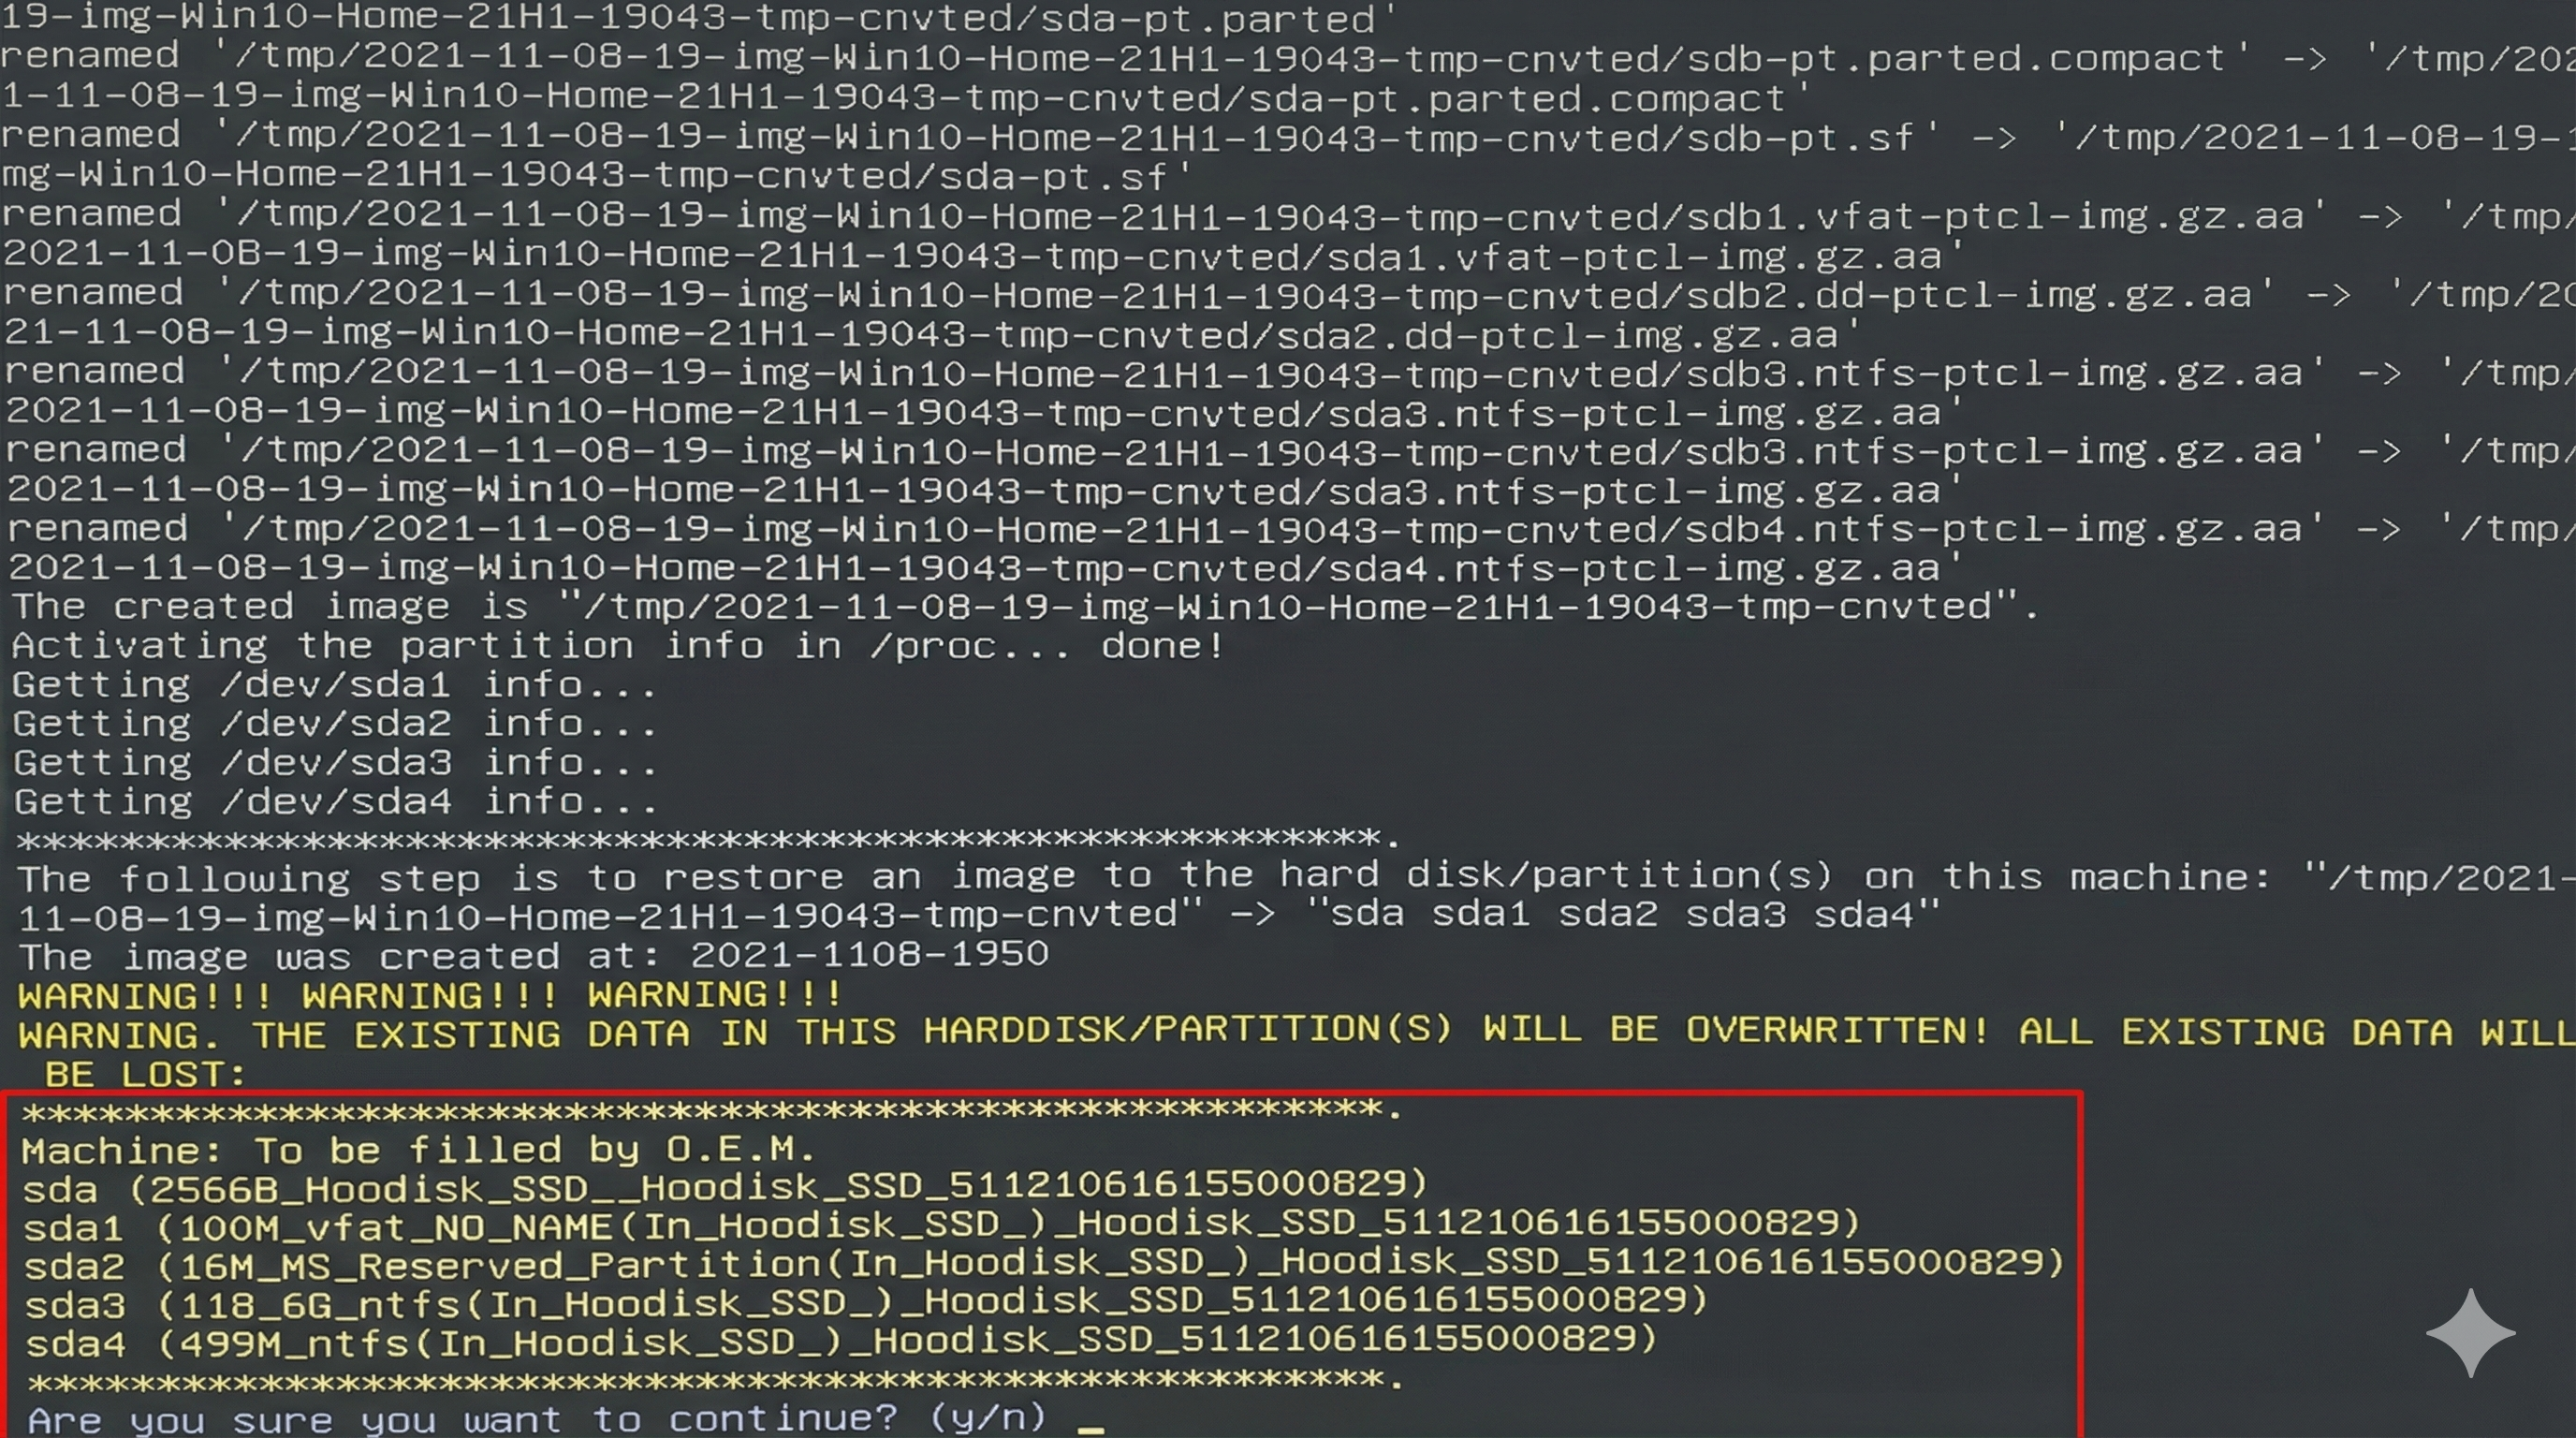
Restoration continued
Step 6:
A series of screens will be displayed during the restoration process, much like the image checking process.
Once the image has been restored a menu will be displayed with boot options. Select Reboot and when the screen blanks, remove the bootable flash drive and enter the BIOS.

Restoration complete
Step 7:
Once the BIOS has been entered select the Boot menu and ensure that the Windows Boot Manager is selected as the first in the boot sequence.
Select F10 to save and exit the BIOS and once the logger has rebooted into Windows the user can now log into the system.
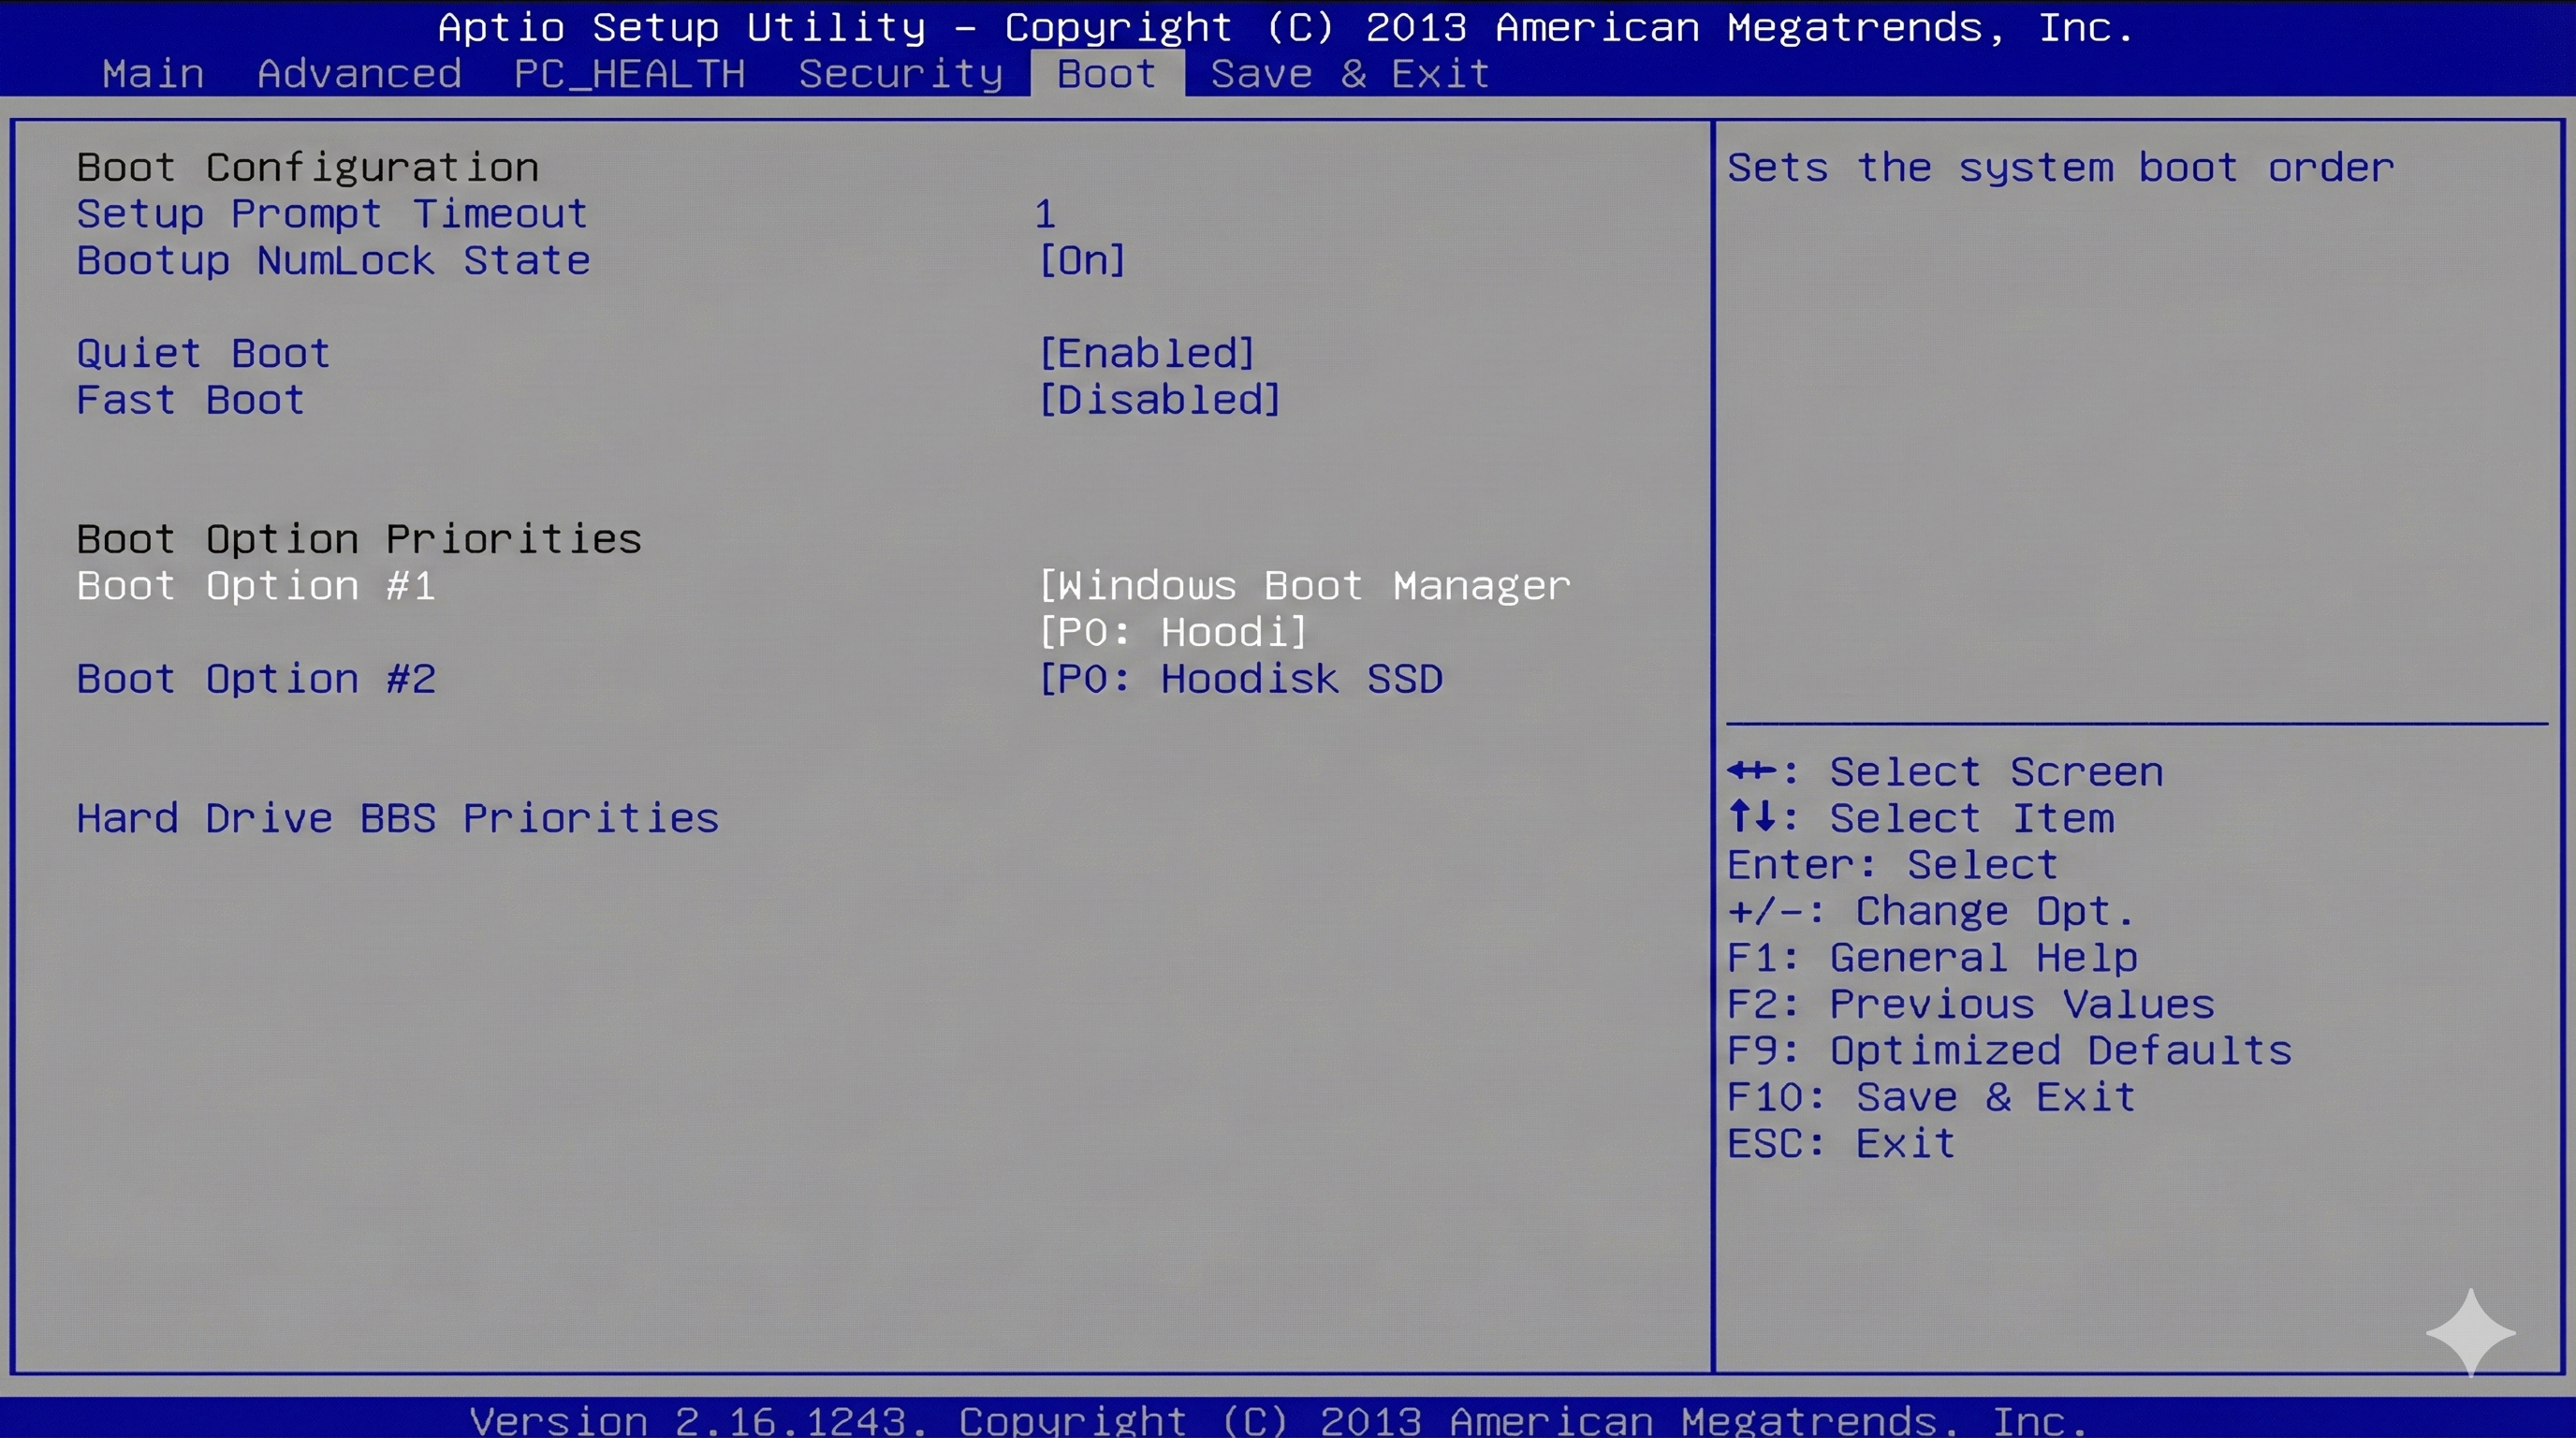
Change boot options